The 4 Principles of an Effective Work Breakdown Structure

In this post I’m going to show you how to create a Work Breakdown Structure as the foundation for your project planning.

Definition

A Work Breakdown Structure (WBS) is a simple, yet methodical way of organizing a project scope in a hierarchy of smaller and manageable components and is the foundation of project planning.

pyramid

Why

So, why bother creating a WBS for your project?
Hereafter a few reasons…

  • Gives clarity on the project needs in terms of deliverables and success criteria – it highlights the “what” of the project
  • Subdivides the scope into manageable components in terms of size, duration, and responsibility
  • Aids in monitoring and controlling the project

question

Principles

  1. 100% Rule: The WBS should define the total scope of the project and capture ALL deliverables, including project management. If not, the risk of gaps and missing components is high.
  2. Mutual Exclusivity: It is important that there is no overlap in scope definition between two elements of a WBS. This ambiguity could result in duplicated work.
  3. Deliverables, Not Actions: Deliverables are the desired ends of the project, such as a product, result, or service and can be predicted accurately. Actions, on the other hand, may be difficult to predict accurately.
  4. Reasonable Level of Detail: Don’t go into too much detail. What you’re looking for is enough detail so you can plan, manage and control the project. An effective limit of WBS granularity may be reached when it is no longer possible to define deliverables and the only details remaining are actions. The lowest level in the WBS is called a “Work Package”.

principles

Process

  1. List high-level deliverables
  2. Get granular
  3. Check WBS principles

process

Example

In the following image you can see an ideal Work Breakdown Structure.

example

Agile

WBS applies also to Agile. An agile WBS is organized around end-user deliverables. Here deliverables are decomposed into Epics, User Stories and Functionalities.

agile

How to Design Better and Faster with Rapid Prototyping

In this post I’m going to show you how to use low-fidelity prototypes to gather and analyze requirements and get users actively involved in the process.

Introduction

A picture speaks a thousand words

The majority of us prefer visual communication compared to reading lots and lots of fine print. The former method is fun and immersive, the latter requires total concentration and is painful to many.

prototype_brain.png

These concepts capture better that anything else what user interface prototyping is all about:

Using visuals to describe verbose software requirements and specifications that detail how a system should behave and look

Process

Rapid Prototyping is the process of quickly mocking up the system to build and validating it with users, stakeholders, developers and designers.

Doing this rapidly and iteratively generates feedback early and often, improving the final design and reducing the need for expensive changes during development.

prototype_process.png

Advantages

  • Increased user involvement. Prototyping requires user involvement and let them see and interact with the system before it is built allowing better and more complete feedback and specifications
  • Early testing. Errors, usability issues and missing functionality can be detected earlier in the process
  • Criticality detection. Confusing or difficult functionalities can be identified easily
  • Increased clarity. Ambiguity and misinterpretation are reduced
  • Reduced cost for changes. Because changes cost exponentially more to implement as they are detected later in development, the early determination of what the user really wants can result in less expensive software

prototype_advantages.png

Dos

  • Prototype only those features or functionality that can be implemented. When in doubt, confirm with developers before starting
  • Begin prototype review sessions with clear guidelines for feedback. Be very specific about the type of feedback you are looking for (Are the steps logically arranged? Is the navigation clear and intuitive?)

Fidelity

Fidelity refers to how closely a prototype resembles the final solution.

There are multiple dimensions of fidelity (Visual, Functional and Content), and prototypes can lie anywhere on the spectrum for each of these dimensions.

prototype_fidelity.png

My advice is to build prototypes with low-fidelity for visual and content dimensions, and high-fidelity for the functional one (interactivity). In that way users can focus on the functional aspects of the system and are not distracted by its look and feel.

Indeed, high visual and content fidelity can sidetrack prototype reviews. Rather than telling you about navigation and interactivity users will start focusing on colors, fonts etc. which is not appropriate in early stages of the design process.

Tools

Depending on your approach, you have a wide variety of tools to choose from.

A really interesting low-fidelity prototyping tool is Balsamiq. This tool lets you quickly mockup a design by dragging and dropping common interface elements onto a layout.

Balsamiq prototypes can encapsulate nearly everything – full screen transitions, modal views, status/error messages and so on. No programming skills are required and different templates and building blocks are available.

You will be surprised how quick and inexpensive it can be to produce a representational prototype with this tool.

Here below you can see a screenshot of a prototype I’ve built with Balsamiq for one of my clients using the SharePoint 2013 template.

prototype_mockup.png

References

Lyndon Cerejo

Andrew Chen

3 Core Principles to Write Clean Code

In this post I’m going to show you how to write code that is easy to read, maintain and understand.

Introduction

Coding is for humans.
Clean code is the art of writing code that humans can understand.

Any fool can write code that a computer can understand.
Good programmers write code that humans can understand

Martin Fowler

We’ll walk through 3 core clean coding practices:

  1. Stay Native
  2. Maximize Signal to Noise Ratio
  3. Write Self-Documenting Code

1. Stay Native

native

Avoid using one language to write another language via strings.
Do not use strings in C#, Java etc. to generate

  • JavaScript
  • HTML
  • XML
  • CSS

dirty_code

2. Maximize Signal to Noise Ratio

signal

Signal is code that follows the TED rule. It is Terse, Expressive and Does one thing.

Noise is anything else:
• Repetition
• Huge Classes
• Long Methods
• High Complexity
• Excessive Indentation
• Unnecessary Comments
• Poor Naming

3. Write Self-Documenting Code

self-documenting

Understanding the original programmer’s intent is the most difficult problem.
Code’s author intent should be clear. Well written code is self-documenting and can reduce and hopefully eliminate the need for comments or external documentation like Javadoc or Wikis.

Self-documenting code does 4 core things:

  1. Expresses author’s intent clearly
  2. Uses layers of abstraction (code navigable through different levels of details)
  3. Is formatted for readability
  4. Favors self-expressing code over comments

References

Cory House

Robert C. Martin

CSR and MDS: 4 Steps to get the Best from both Worlds

I’m going to show you how to create a CSR (or JSLink) script that works with and without MDS and follows coding best practices.

Scenario

Both CSR (Client-Side Rendering) and MDS (Minimal Download Strategy) are new concepts in SharePoint 2013.
CSR lets you control how your list data is displayed using Javascript.

CSR

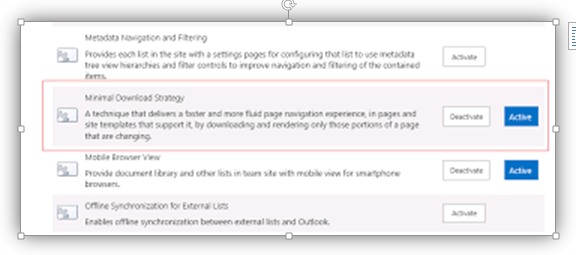
MDS improves rendering performance where large parts of the page do not change, providing a more fluid navigation experience.

MDS.png

Problem

The problem is that CSR works fine with MDS only on the first page request or after a refresh. As soon as the user switches between views or navigates around and then comes back to the original page, the CSR customization vanishes and the default rendering takes place again.

I’ll try to explain what happens here.
When the page is first rendered, the MDS system receives the custom script for the first time and puts it in a list of already executed scripts. When subsequent pages are requested, MDS checks its own list of already executed scripts and will simply not execute them again.

However you want the CSR script to execute every single time… So, how to achieve that without disabling MDS feature and keeping its performance gains?

Solution

The following CSR script comprises 4 steps:

  1. Following Coding Best Practices
  2. Addressing MDS Garbage Collection issue
  3. Addressing MDS Script Reload issue
  4. Making it work without MDS as well
Type.registerNamespace('Client');
Client.Project = Client.Project || {};
Client.Project.Templates = Client.Project.Templates || {};
Client.Project.Functions = Client.Project.Functions || {};

Client.Project.Functions.Display = function (context) {
var currentValue = context.CurrentItem.MyFieldInternalName
if (currentValue > 0) {
return currentValue;
}
else {
return '<span style="color:red">' + currentValue + '</span>';
}
}

Client.Project.Templates.Fields = {
'MyFieldInternalName': {
'DisplayForm': Client.Project.Functions.Display,
'View': Client.Project.Functions.Display,
'NewForm': null,
'EditForm': null
}
}

Client.Project.Functions.OverrideTemplates = function () {
SPClientTemplates.TemplateManager.RegisterTemplateOverrides(Client.Project);
}
Client.Project.Functions.MdsOverrideTemplates = function () {
var scriptUrl = _spPageContextInfo.siteServerRelativeUrl + "/SiteAssets/CSRScript.js";
Client.Project.Functions.OverrideTemplates();
RegisterModuleInit(scriptUrl,Client.Project.Functions.OverrideTemplates);
}

if (typeof _spPageContextInfo != "undefined" && _spPageContextInfo != null) {
Client.Project.Functions.MdsOverrideTemplates();
} else {
Client.Project.Functions.OverrideTemplates();
}

Let’s examine the above script in more details.

1. Following Coding Best Practises

Define your own namespaces to avoid polluting the global one.

Client.Project = Client.Project || {};
Client.Project.Templates = Client.Project.Templates || {};
Client.Project.Functions = Client.Project.Functions || {};

2. Addressing MDS Garbage Collection issue

Register your root namespace to avoid MDS Garbage Collection to wipe it away during page transitions.

Type.registerNamespace('Client');

3. Addressing MDS Script Reload issue

Register your script to have MDS system reload it every time, even after a page transition.

var scriptUrl = _spPageContextInfo.siteServerRelativeUrl + "/SiteAssets/CSRScript.js";
RegisterModuleInit(scriptUrl, Client.Project.Functions.OverrideTemplates);

Append a revision number to the JSLink attribute of your custom field definition and update it at any script change/deploy in order to prevent browsers from using the old cached version.

<Field
      ID="{ce3d02df-d05f-4476-b457-6b28f1531f7c}"
      Name="MyFieldInternalName"
      DisplayName="My field display name"
      Type="Number"
      Required="FALSE"
      JSLink="~sitecollection/SiteAssets/CSRScript.js?rev=1.0.0.0"
      Group="My Custom Group">
</Field>

4. Making it work without MDS as well

If MDS is disabled the _spPageContextInfo object is undefined in the script inline code.
If that is the case there is no need to register your script and you can call the template override function directly.

if (typeof _spPageContextInfo != ‘undefined’ &amp;amp;amp;amp;&amp;amp;amp;amp; _spPageContextInfo != null) {
   Client.Project.Functions.MdsOverrideTemplates();
} else {
   Client.Project.Functions.OverrideTemplates();
}

References

Wictor Wilén

Martin Hatch

Technet